Call this Monday to Get 10% OFF
Call this Monday to Get 10% OFF
24-Hour Emergency Electricians in Fort WorthCall this Monday to Get 10% OFF
Call this Monday to Get 10% OFF
24-Hour Emergency Electricians in Fort Worth
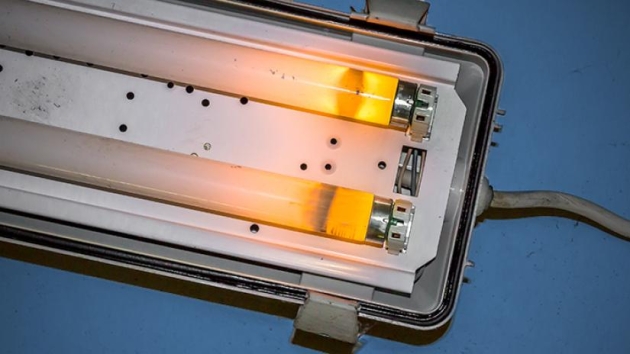
Replacing a fluorescent light ballast is a big job, and the whole project may take anywhere from one…
Replacing a fluorescent light ballast is a big job, and the whole project may take anywhere from one to four hours. A large part of this time is taken up by removing the components from the ceiling, pulling out the old ballast, and reinstalling the new ballast. With Mr. Electric's educational information below, you'll understand the full process of what is involved with replacing a fluorescent light ballast.
Fluorescent light fixtures are an efficient means of lighting up a large area. While the ballasts don't go bad often, they can be a hassle to replace. The fluorescent light ballast is hidden from view, so finding it can be difficult. It's also important to take safety precautions before working on any electrical device.
The guys were super nice, I loved that they did the work immediately. Also after having a discussion with them about the static electricity from a lightenimg strike we had and it fried everything they suggested a surge protector to keep that from happening again. So we did that.
Scheduled an appointment with Mr Electric of Fort Worth and received a call they were able to show up early and had Dylan show up on time stocked with a full truck. He was able to diagnosis the issue quickly and restore my power to a few plugs that were causing the breakers to trip continuously. Dylan was very knowledgable, clearly explained the cause and how he would fix the issue, and addressed all concerns that we had. He was replaced two breakers and installed 2 new outlets along with diagnosing the problem in about an hour. Very quick and so far seems to have resolved our electrical issue. Would definitely recommend Mr Electric of Fort Worth!
Dylan was so nice and always on time. Very qualified and explained everything he needed to do in a way I understood. My older house required an outside panel so I had a lot of work but Dylan and his helper worked together very well and finished on time so I was not out of power more than needed. Everything looked and worked great when done. I don't know how he was able to replace the cracked power pole and wiring on my roof so quickly and beautifully. I am very, very impressed with his skill level and would request him for any future work. The company is very well organized and office contact was a pleasure to work with(which is rare since these positions are usually underpaid)so reward her well, she is the "door" to your organization. She and Dylan sealed my deal!
Cody was professional, knowledgeable, and was able to provide me with a quick diagnosis pertaining to a wiring issue in one of my rooms. He gave me the price for the repair/modification and fixed the issue all in less than an hour. Thanks Cody!
Follow these steps to replace your fluorescent light ballast:
Tools
Phillips screwdriver
We provide reliable, professional electrical services backed by licensed electricians and upfront pricing. Our team is committed to safety, quality workmanship, and on-time service for every job. With trusted local expertise and customer-first care, we deliver solutions you can count on.

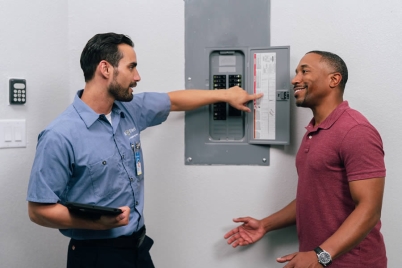
Shut Off Power
Always shut off power at your electrical panel before working with the wiring. If you are uncertain about which breaker controls the circuit, use a non-contact voltage tester to verify that there is no power running to the fixture. You can then proceed with replacing the ballast.
Remove Fixture Cover
Use your Phillips screwdriver to remove the screws holding on the cover. Be careful not to drop the cover when removing it -- you may have broken glass inside. If so, proceed slowly and clean up any shards as you go along.
Remove Fluorescent Light Tubes
First, remove the bulbs from the light and then unplug them from the junction box or turn off the power at the breaker or fuse box for your lighting replacement.
Remove Cover Plate
Next, remove the cover plate from the fixture by unscrewing it with a screwdriver.
Check Voltage Use
a non-contact voltage tester to check for voltage in each wire connected to the existing ballast before proceeding. If there's any voltage present, stop and call an electrician for help.
Take a Photo Of the Wires
Take a digital photo of the wiring before disconnecting any wires so you can use it as a reference when replacing your ballast.
Disconnect Ballast Wires
Disconnect each wire connected to the ballast using needlenose pliers.
Remove Ballast Loosen
the screws on the electrical components to remove them from their slots. There may be more than one ballast in your fixture, so repeat this for each. Once all of them are removed, no electrical components remain within the fixture.
Prepare Wires For New Ballast
Your old ballast may have been held with tape or wire nuts. Remove these components and dispose of them properly once they are no longer attached to anything else. The wires should be clearly labeled as hot and neutral wires, but you can consult a certified electrician at Mr. Electric if they aren't.
Install New Ballast
Reinstall mounting screws, being careful not to over-tighten them not to crack the fixture's plastic housing. According to the wiring diagram (usually color-coded), reconnect wires, then snap ends onto corresponding wire terminals on the new ballast.
Reinstall Light Components
Use the same procedure to reinstall your light fixture components, but be careful not to bend the tube.
Restore Power
Make sure your wires are clear of the fluorescent light ballast and turn the power on. If your new ballast works properly, you will see a bright glow from your lights.
Dispose of Old Ballast Properly
Fluorescent light ballasts contain PCBs, which are toxic. Check with your local waste management department to find out how to properly dispose of your old ballast.
Fluorescent light ballasts are essential for providing power to fluorescent tubes and are used to control the electric current that is sent through a fluorescent tube. Fluorescent light ballasts can fail over time and result in flickering lights or no lights. Since each has unique wiring, take photos before attempting repairs.
Contact Mr. Electric when you have questions regarding all your electrical needs.
Electricity plays a crucial role in powering homes and businesses. With the growing demand for electrical needs due to technological advancements…
Read More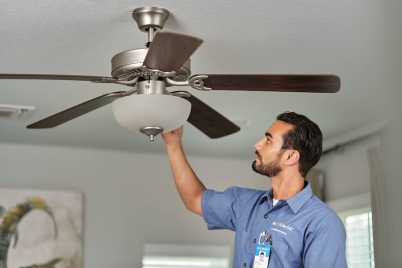
A ceiling fan installation or replacement may seem like a straightforward upgrade, but it is bigger and more complex than most…
Read More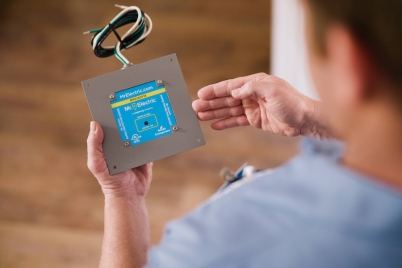
When upgrading your home’s electrical system, surge protection installation plays a crucial part in protecting your home, loved ones, and valuables/…
Read MoreAre you looking to bring your home into the future and enjoy the convenience that comes with it? Whether it is…
Read MoreNothing is more frustrating than a power outage when you need consistent power for daily activities. The situation is worse in…
Read More